Cakewalk // Documentation // SONAR X2 // Using the Matrix view
Table of Contents Previous Next Index

View referenceMatrix view ► Using the Matrix view

list-image
Do one of the following:
list-image
Select Views > Matrix view.
You can drag audio, MIDI Groove Clips, Step Sequencer patterns and Project5 patterns from the Media Browser view or from the Clips pane into the Matrix view. Do one of the following:
list-image
Right-click a cell and select Import File on the context menu.
list-image
To assign a pattern to a cell in an empty row. If you drag a pattern to an empty row, you can specify if the new row should be assigned to an existing track or to a new corresponding track:
list-image
list-image
To create a new row and corresponding track. Hold down the ALT key and drag a pattern to the desired cell in an empty row.
When dragging a clip from the Clips pane, the cell will automatically inherit the clip name and color. If the clip has no name, the cell will be named “Audio” or “MIDI”.
Note 1: Rows that are assigned to audio tracks can only contain cells with audio data. Likewise, rows that are routed to MIDI or Instrument tracks can only contain cells with MIDI data. The Audio or MIDI identity of a row is established when the first pattern is dragged into the row.
Note 2: When you drag a clip from the Clips pane and drop it in the Matrix view, the Matrix view will use the entire raw clip data, even if the clip is cropped. If you want the Matrix view to only use the uncropped part of the clip, first use the Track view Clips > Bounce to Clip(s) command to create a new clip. If you want the clip to loop smoothly, you may also want to convert the new clip to a Groove clip and edit it in the Loop Construction view before you drag it into the Matrix view.
Tip: If you want to always import audio as Groove Clips, click the Options button to open the Matrix Options dialog box, then click the Import all audio as GrooveClips check box.
list-image
Do one of the following:
list-image
Right-click the cell and select Clear Cell from the pop-up menu.
list-image
Click the arrow next to the Stop All Cells button in the Matrix view toolbar and select Clear All Cells from the drop-down menu.
list-image
Click the Trigger Resolution menu and select one of the available options:
Immediate. Playback starts immediately.
Next Measure. Playback starts on the next measure boundary.
Next Beat. Playback starts on the next beat.
Next 1/8. Playback starts on the next 8th note.
Next 1/16. Playback starts on the next 16th note.
Next 1/32 Note. Playback starts on the next 32th note.
Next 1/64 Note. Playback starts on the next 64th note.
After a cell has been triggered, the cell blinks until the Trigger Resolution is reached, at which time playback starts.
list-image
Make sure the Cell Start toggle is in Always from Beginning mode before you trigger the pattern.
Tip: To trigger a cell using the opposite mode of the current Cell Start setting, hold down the ALT key when you trigger the cell.
list-image
Right-click the cell and select One-Shot Trigger on the context menu.
The Loop Mode and Latch Mode buttons in the cell are hidden. When One-Shot Trigger mode is enabled, loop and latch settings are ignored, and the cell only plays one repetition from beginning to end.
To disable One-Shot Trigger mode, right-click the cell and select One-Shot Trigger on the context menu.
list-image
Make sure the Cell Start toggle is in Offset to Now Time mode before you trigger the pattern.
Tip: To trigger a cell using the opposite mode of the current Cell Start setting, hold down the ALT key when you trigger the cell.
When you trigger a cell in Offset to Now Time mode, the pattern will start playing in sync with the Now time after the amount of time listed in the Trigger Resolution menu. It’s as if the cell’s pattern is repeated throughout the song and you unmute the pattern at a certain point.
list-image
Make sure the Follow Transport button is enabled.
list-image
Do one of the following:
list-image
After the cell has been triggered, the cell blinks until the Trigger Resolution is reached, at which time playback starts.
The global Cell Start toggle determines if the pattern will play from the beginning of the pattern or synchronize to the project’s Now time. In Always from Beginning mode , patterns always start from the beginning. In Offset to Now Time mode , patterns synchronize to the project’s Now time.
Tip: To trigger a cell using the opposite mode of the current Cell Start setting, hold down the ALT key when you trigger the cell.
During playback, the cell displays a “play” icon and a circular progress indicator to show the position of the loop as it is playing. Patterns repeat themselves until you stop playback or until another pattern in the same row starts to play (non-looped content play as one-shots, meaning the patterns play only once).
Note 1: Only one cell per row can be triggered at a time. You can trigger multiple cells simultaneously as long as they are located in different rows.
Note 2: Together, the Global Latch Mode and Global Loop Mode toggles give you flexible control over how cells are triggered.
list-image
To play a cell continuously when triggered. Enable Global Loop Mode; enable Global Latch Mode
list-image
To play a cell once through when triggered. Disable Global Loop Mode; enable Global Latch Mode
list-image
To play a cell continuously as long as the mouse/note is held. Enable Global Loop Mode; Disable Global Latch Mode
list-image
To play a cell as long as the mouse/note is held, but stop at end. Disable Global Loop Mode; disable Global Latch Mode
By default, a cell follows the Global Trigger Resolution, as specified in the Matrix view toolbar. You can also assign a custom trigger resolution to each cell, instead of following the global trigger resolution.
1.
Right-click the cell, point to Trigger Resolution on the pop-up menu, and select one of the following options:
list-image
list-image
2.
Do one of the following:
A. Follow Global Trigger Resolution (no resolution is displayed) B. Per-cell Trigger Resolution (assigned resolution is displayed)
A. Click the Column Trigger to trigger all cells in the column
The cell has an orange outline. The next MIDI event the Matrix receives will be assigned to all cells that are in MIDI Learn mode.
Note: If the Cell MIDI Trigger button in the Matrix view toolbar is disabled, it will automatically be enabled when a cell is in MIDI Learn mode.
1.
Make sure the Cell MIDI Trigger button in the Matrix view toolbar is enabled.
Note: You can also use a MIDI modifier key to trigger a cell using the opposite mode of the current Cell Start, Global Loop Mode, Global Latch Mode, or Retrigger Mode settings. To MIDI learn the MIDI modifier functions, Right-click the desired global mode button in the Matrix toolbar, choose MIDI Learn, then press the desired modifier note on your MIDI controller.
To use a modifier in a performance, press the appropriate modifier key on your MIDI controller, as learned using the steps outlined above. This action will invert the corresponding mode behavior for the very next cell that is triggered. Once a cell has been triggered, the modifier key is cleared and Matrix cell triggering will resume based on mode settings in the Matrix.
list-image
Make sure the Cell MIDI Trigger button in the Matrix view toolbar is disabled.
list-image
Do one of the following:
list-image
To clear MIDI assignments for a single cell. Right-click the desired cell and select Clear MIDI Learn on the pop-up menu.
list-image
To clear MIDI assignments for a single Column Trigger. Right-click the desired cell and select Clear MIDI Learn on the pop-up menu.
list-image
To clear MIDI assignments for all cells and Column Triggers. Click the arrow next to the Stop All Cells button in the Matrix view toolbar and select Clear All MIDI Learn from the drop-down menu.
1.
Make sure the Retrigger Mode toggle in the Matrix View toolbar is enabled.
2.
Do one of the following:
1.
Make sure the Follow Transport button is enabled.
list-image
Do one of the following:
list-image
Do one of the following:
list-image
Right-click a column header and select Insert Column on the context menu.
list-image
Right-click a column header and select Duplicate Column on the context menu.
1.
Right-click a column header and select Rename Column on the context menu.
The Rename Column dialog box appears.
list-image
Click the Stop All Cells button in the Matrix view toolbar.
list-image
Click the cell’s Latch Mode button.
Note: After a cell’s Latch Mode button has been engaged, the cell will no longer continue to follow the Global Latch Mode setting, even if you disable the cell’s Latch Mode button. To restore the link to the Global Latch Mode setting, hold down the CTRL key and click the cell’s Latch Mode button.
list-image
Click the cell’s Loop Mode button.
Note: After a cell’s Loop Mode button has been engaged, the cell will no longer continue to follow the Global Loop Mode setting, even if you disable the cell’s Loop Mode button. To restore the link to the Global Loop Mode setting, hold down the CTRL key and click the cell’s Loop Mode button.
list-image
Click the row’s Mute button .
A. Click the row’s Mute button to mute/unmute a row
list-image
Click the row’s Solo button .
A. Click the row’s Solo button to solo/unsolo a row
list-image
Click the row’s Direct Mode button . Doing so will bypass the assigned track’s MIDI processing, such as MIDI FX, Arpeggiator, volume, etc., and send the row directly to the assigned soft synth or hardware output.
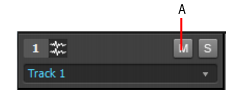
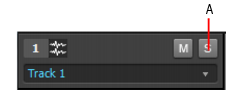
A. Click the row’s Direct Mode button to bypass all MIDI track processing
A. Click arrow to reassign a row to a different track
1.
Right-click a cell and select Rename Cell from the pop-up menu.
The Rename Cell dialog box appears.
You can capture (record) the output of the Matrix on the same tracks that rows are assigned to. When capturing data from the Matrix, any existing clips in the target tracks are unaffected.
1.
Specify the desired triggering time lag in the Trigger Resolution drop-down menu.
2.
Click the Capture Matrix Performance button to enable it.
5.
Press Play in SONAR to start playback.
6.
When you want to stop recording, press Stop in SONAR or press the SPACEBAR key.

Copyright © 2024 Cakewalk, Inc. All rights reserved
Sitemap | Privacy Policy | Legal